From the Manage Teachers window, Portal users can search for teachers, view and edit teacher information, designate users as teachers, delete teachers, and export teacher information.
- To search for teachers, open the My Applications menu bar and select Teacher Management to display the Manage Teachers window.
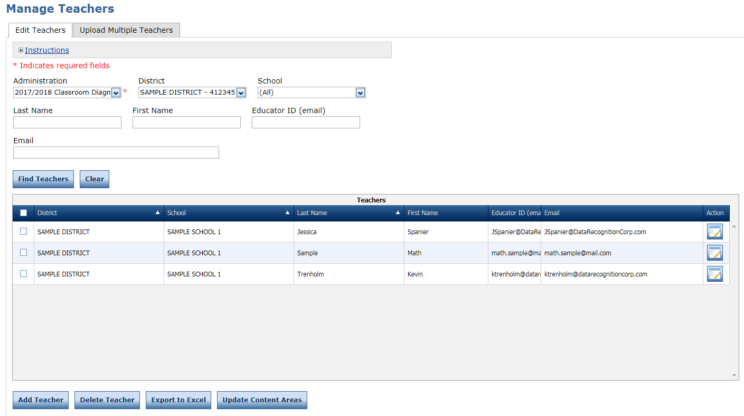
- Enter or select your search criteria and click Find Teachers. Teachers that match your selection criteria display at the bottom of the window.
- What you do next depends on whether the teacher you are searching for exists in the Portal.
- If the teacher exists, they can be associated with test sessions and/or student groups for that district and school.
- If the teacher does not exist, click Add Teacher to designate the teacher in the Portal.
- Click the View/Edit icon (
 ) to edit the teacher information on the Edit Teacher window.
 - Click Save when your updates are complete.
You can add teacher records to the Portal one at-a-time, or upload multiple teacher records at once (see “Uploading Multiple Teachers” on page 64). Teachers must be added so they can be associated to student groups, which facilitate creating test sessions. A teacher can quickly create test sessions for the testers within a student group. In some areas of the Portal, you can filter students based on a teacher or student group.
Note: Teachers must have a student group assigned to them before they can display their students’ information in the Portal.
Tip 1: Do not designate Teachers in Teacher Management prior to adding the Teacher as a user in User Management.
Tip 2: Users with a teacher role added through UI or Multiple User Upload will now be seamlessly integrated into Teacher Management. No manual addition is required. The automated process runs daily every two hours, with the first run at 10 am and the last run at 4 pm CST. If teachers are not visible in teacher management or student group management after uploading them as users, please allow up to 24 hours for the system to sync.
Uploading Multiple Teachers
You can simultaneously add multiple teachers to the Portal by uploading a file using the Upload Multiple Teachers process.
- To upload multiple teacher records, open the My Applications menu bar, select Teacher Management to display the Manage Teacher page, and select the Upload Multiple Teachers tab.
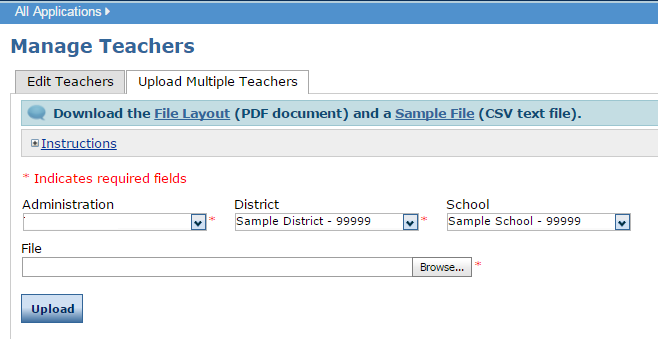
- Use the drop-down menu filtering options to select the correct administration, district, and school.The Upload Multiple Teachers tab contains links to both a sample PDF file that contains instructions and a sample .csv file that you can use to create the actual file.Click the Download the File Layout link to display the Upload Multiple Teachers File Layout file. This file displays the required layout of the .csv file you will upload to DRC with rules, instructions, and examples describing how to create and format the file.Click the Sample File link to download or display the SampleTeacherFile.csv file. This file is only a sample of the type of file you will upload to DRC.Note: Depending on the browser you are using, a dialog box may appear for you to use to open or download the file.
- Use the SampleTeacherFile.txt file to create, rename, and save a teacher file to upload.Note: Be sure to keep the header column rows in the file you upload.
- After you have created a teachers file, click Browse to locate it, select the file, and click Open to display it in the File field of the Upload Multiple Teachers tab.
- Click Upload. A message displays indicating the file has been transferred and is being checked for errors. After the file has been validated, you can review its status. If the file contains errors, you must correct them and repeat Steps 4 and 5.